The pursuit of perfectly curled lashes often feels like an exercise in futility, particularly for those blessed with naturally straight or downward-pointing lashes. While the promise of dramatic, lifted lashes seems achievable with the right eyelash curler, achieving long-lasting results without compromising lash health requires a sophisticated understanding of both technique and biology. The challenge extends beyond simply purchasing the most expensive curler on the market; it demands a comprehensive approach that considers individual lash characteristics, proper preparation methods, and advanced application techniques.
Modern beauty enthusiasts increasingly recognise that successful lash curling represents a delicate balance between mechanical manipulation and biological preservation. The science behind curl retention involves multiple factors, from the molecular structure of keratin fibres to the environmental conditions that influence lash elasticity. Understanding these fundamental principles transforms lash curling from a daily frustration into a predictable, repeatable process that enhances natural beauty whilst maintaining lash integrity over time.
Understanding eyelash anatomy and curl mechanics for optimal results
The foundation of successful lash curling lies in comprehending the complex biological structure that determines how individual lashes respond to mechanical manipulation. Each eyelash represents a sophisticated protein structure composed primarily of keratin, the same fibrous protein found in hair and nails. This keratin matrix contains both alpha-helical and beta-sheet configurations, which directly influence the lash’s ability to maintain shape under stress. The molecular bonds within this structure determine flexibility, elasticity, and the potential for temporary reshaping through controlled pressure and temperature application.
Keratin structure and hair follicle orientation impact on curl retention
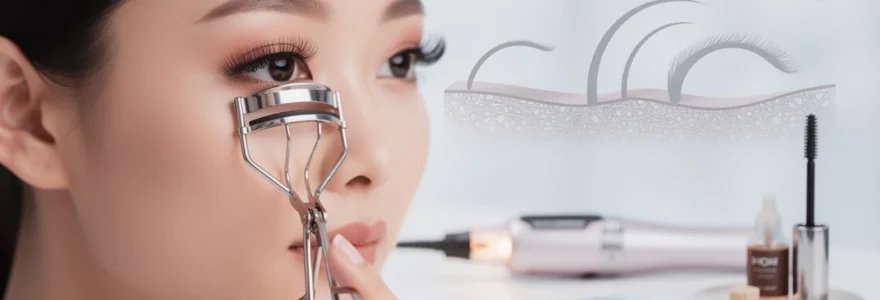
The orientation of hair follicles beneath the eyelid creates the foundation for natural lash direction and curvature potential. Follicles positioned at acute angles to the skin surface naturally produce lashes with greater upward trajectory, whilst perpendicular follicles create straight-growing lashes that resist curling efforts. Keratin density variations within individual lashes also affect curl retention, with higher density areas maintaining shape longer than regions with looser protein structures. Understanding your personal follicle orientation helps predict which curling techniques will yield the most sustainable results.
Growth phase cycles: anagen, catagen, and telogen effects on lash flexibility
Eyelash growth occurs in distinct phases that significantly impact curling success and lash resilience. During the anagen phase, which lasts 30-45 days for eyelashes, active protein synthesis creates stronger, more flexible lashes that respond optimally to curling efforts. The catagen transitional phase reduces protein production, making lashes more brittle and susceptible to damage from mechanical stress. Telogen phase lashes, preparing for natural shedding, demonstrate decreased elasticity and should receive gentler treatment to prevent premature loss.
Natural lash curvature patterns: asian, caucasian, and african hair types
Genetic variations in hair structure create distinct curling challenges across different ethnic backgrounds. Asian eyelashes typically exhibit straight growth patterns with dense, coarse fibres that resist initial curling but maintain shape exceptionally well once properly formed. Caucasian lashes demonstrate moderate natural curvature with medium protein density, responding well to standard curling techniques. African-descent lashes often feature natural curl patterns that require different approaches, focusing on enhancement rather than complete reshaping. Recognising your natural lash type allows for technique customisation that maximises results whilst minimising damage risk.
Temperature and humidity influence on lash elasticity and memory
Environmental conditions play a crucial role in determining curl longevity and lash behaviour throughout the day. High humidity levels increase keratin moisture content, reducing structural rigidity and causing curls to relax more quickly. Temperature fluctuations affect protein bond stability, with moderate warmth increasing flexibility during curling but potentially weakening long-term shape retention. Understanding these environmental factors enables proactive adjustments to curling techniques and product selection based on daily weather conditions and climate considerations.
Professional eyelash curler selection and technical specifications
The selection of an appropriate eyelash curler represents far more than a cosm
metic accessory; it functions as a precision tool that must match your eye shape, lash density, and preferred technique. A professional-grade eyelash curler distributes pressure evenly along the lash line, minimising hot spots that cause crimping or breakage. Technical specifications such as curve radius, metal alloy composition, and silicone pad density all influence how effectively your lashes can be lifted and how long that lift will last. When chosen correctly, the right curler works with your natural lash anatomy rather than against it, making long-lasting curl far easier to achieve.
Shu uemura versus shiseido: metal alloy composition and heating properties
Among professional makeup artists, Shu Uemura and Shiseido curlers frequently emerge as industry benchmarks, and the distinction is more than brand prestige. Both utilise high-grade metal alloys designed to offer structural stability whilst remaining lightweight enough for precise manoeuvring. Shu Uemura curlers typically feature a slightly firmer hinge tension and polished steel that conducts heat efficiently when used with gentle warming techniques, enhancing curl setting without requiring excessive pressure. Shiseido designs often prioritise a wider opening and subtly different curvature, with metal alloys engineered for durability and smooth glide against the skin.
When considering heating properties for long-lasting lift, metal thickness and alloy composition determine how quickly a curler warms and how evenly it retains gentle heat. Thinner metal arms warm faster but can cool rapidly, which may require repeated warming for stubborn, straight lashes. Slightly thicker or more thermally stable alloys hold low-level heat for longer, providing a more controlled environment for reshaping the keratin structure of lashes. Whichever brand you choose, always remember that the goal of warming is to mimic a low-heat styling tool, not to create a hot surface that risks burning delicate eyelid skin or damaging lash cuticles.
Silicone pad density and replacement indicators for maximum grip
The seemingly simple silicone pad plays a critical role in protecting lashes and generating uniform curl. High-density silicone pads provide resilient cushioning that bounces back after each squeeze, distributing pressure across the lash line instead of concentrating force at a single point. Softer, low-density pads may feel comfortable initially but can collapse under pressure, leading to sharp bends or “crimp marks” that weaken the lash shaft over time. For anyone seeking a long-lasting lash curl, pad quality is just as important as the metal frame.
As you use your eyelash curler regularly, the pad gradually compresses and develops a visible groove where the metal bar makes contact. This groove is your primary indicator that replacement is overdue: once the indentation deepens, lashes can slip into the groove and become pinched or even severed. Most professionals recommend replacing pads every three months for daily users, or sooner if you notice loss of bounce or irregular curling results. Keeping fresh, medium-to-firm density pads in your curler ensures maximum grip with minimal trauma, enabling you to achieve a reliable curl without repeatedly clamping down.
Curve radius measurements: finding your eye shape match
The curve radius of an eyelash curler determines how well it conforms to your lash line and, ultimately, how many lashes you can capture in a single press. A shallower curve with a wider radius suits larger, more rounded eyes and lash lines that extend farther horizontally, allowing you to reach outer-corner lashes that frame the eye. A deeper curve with a tighter radius tends to fit smaller or more almond-shaped eyes, providing better access to the central lash line without pinching the inner or outer corners. Matching curler curve to your natural eye contour reduces the need for awkward angling and repeated passes, both of which increase breakage risk.
You can roughly assess your ideal curve by observing how your current curler sits against your lash line in a mirror. If the centre touches comfortably but the corners float away, your curler is likely too curved for your eye shape; if the corners align but the middle lifts away, you may need a deeper curve. Some professionals keep two different curve radii on hand for tailoring results—one for everyday use and another narrower design for precision work on the inner or outer corners. Investing time in finding this match can dramatically improve your ability to get a uniform, long-lasting lash curl with a single, controlled motion.
Heated curler technology: panasonic and hitachi thermal mechanisms
For lashes that stubbornly resist traditional curling, heated eyelash curlers from brands like Panasonic and Hitachi offer an alternative approach based on controlled thermal styling. Unlike clamp-style metal curlers, many of these devices resemble mascara wands or combs that gently heat the lashes from below, encouraging the keratin structure to adopt a new shape as it cools. Panasonic models often use ceramic or nichrome heating elements regulated by temperature sensors, ensuring a consistent, low-heat output that is safe for the delicate eye area when used correctly. Hitachi devices typically incorporate multiple heat settings and fine-toothed combs designed to separate and lift each lash for a more defined result.
The advantage of these heated mechanisms lies in their ability to “set” the curl similarly to a hot roller in hairstyling, especially useful for very straight Asian lashes or thick, heavy lash lines. However, as with any thermal tool, technique and moderation are critical. Keeping the device moving, avoiding direct contact with the skin, and respecting the recommended exposure time all help to prevent overdrying or weakening the lash cuticle. When integrated into a careful routine with conditioning products, heated curlers can provide long-lasting lift without the aggressive pressure sometimes required by traditional mechanical curlers.
Pre-curling preparation techniques for lash protection
Preparation before you even pick up an eyelash curler significantly influences both curl quality and lash health. Clean, dry lashes free from oil, sebum, and residual mascara respond more predictably to curling, allowing the keratin structure to reshape without added weight. Begin by thoroughly removing eye makeup with an oil-free remover or micellar water, focusing on the lash line where residue often accumulates. Once clean, allow lashes to air dry completely, as moisture within the hair shaft can weaken structural bonds and reduce curl retention.
For those prone to breakage or with naturally fragile lashes, incorporating a lightweight lash conditioner or serum into your evening routine can build resilience over time. Formulas containing peptides, panthenol, and hyaluronic acid help improve flexibility, which means lashes bend rather than snap under mechanical stress. In the morning, you may choose to apply a minimal amount of clear, fast-drying lash primer before curling, provided it does not remain wet or sticky. The aim of pre-curl preparation is to create a clean, stable, and slightly fortified surface so that the curling process becomes a gentle shaping step instead of a strain on already-compromised lashes.
Advanced curling methodologies and pressure application
Once your tools and lashes are properly prepared, refining your eyelash curler technique is the next step toward achieving a long-lasting lash lift. Advanced curling methodologies focus on how pressure is applied along the length of the lashes, how the curler is angled, and how long each squeeze is held. Rather than a single, forceful clamp that risks creating a harsh bend, a more nuanced, multi-step approach allows the lash to curve in a smooth arc that visually lengthens the eye. By mastering these subtle techniques, you can transform a basic cosmetic step into a precise, repeatable process.
Three-stage progressive curling: root, mid-length, and tip positioning
Three-stage progressive curling divides the lash into root, mid-length, and tip sections, each requiring different levels of pressure for a natural-looking curve. Start by positioning the curler as close to the lash line as possible without catching the skin of the eyelid, then gently close the curler and hold for around 8–10 seconds. This initial clamp at the root establishes the foundation of lift, much like setting the base of a hairstyle before adding volume through the lengths. Avoid jerky movements as you release; instead, open the curler slowly to maintain lash alignment.
Next, slide the curler slightly upward to the mid-lengths of the lashes and apply a second, slightly softer clamp for another 5–8 seconds. This stage transitions the strong root lift into a more gradual bend, preventing the “L-shaped” crimp that can occur when all pressure is concentrated at the base. Finally, move to the tips and perform a light, brief squeeze—often just 3–5 seconds—to refine the curve and prevent the ends from drooping. The cumulative effect is a smooth, C-shaped curl that holds longer because the structural change is distributed evenly rather than forced into a single hinge point.
Pulse-and-hold technique versus continuous pressure application
The pulse-and-hold technique offers an alternative to maintaining continuous pressure, particularly beneficial for dense or resistant lashes. Instead of one sustained clamp, you apply a series of small, rhythmic squeezes that gradually increase the bend while allowing the lashes to adjust incrementally. Think of it as coaxing the lashes into position rather than forcing them, which reduces the likelihood of sudden snapping or uncomfortable tugging. This method can also help you gauge how much pressure is truly needed, preventing the instinctive urge to squeeze as hard as possible.
Continuous pressure application, by contrast, can be effective for fine or already-flexible lashes that respond easily to shaping. However, if you notice visible crimp lines or feel tension at the roots, your continuous pressure may be too intense for your lash type. Many professionals combine both strategies, beginning with a gentle hold at the base and then finishing with light pulses along the mid-lengths and tips. Experimenting with these methods allows you to find the balance that gives you a stable curl without compromising lash integrity or comfort.
Angle optimisation: 45-degree lift versus vertical positioning
The angle at which you hold your eyelash curler in relation to your face significantly affects the final shape and perceived length of your lashes. Positioning the curler at approximately a 45-degree angle from your cheekbone usually delivers a more natural, eye-opening lift, as it follows the natural arc of the eyelid. This orientation allows the curler to capture the majority of the lash line in one pass while directing the curl upward and slightly outward, enhancing the illusion of larger, more awake eyes. For everyday wear, this 45-degree lift tends to be the most flattering and universally wearable option.
Vertical positioning, where the curler is held nearly perpendicular to the face, can create a more dramatic, doll-like effect but carries a higher risk of over-bending the lash at a single point. This approach may be useful for editorial looks or when you want very pronounced curl at the centre of the eye, but it demands precise control and a lighter touch. If you choose to experiment with vertical angles, start with the mid-lengths rather than the roots to avoid sharp kinks at the lash line. Over time, you will develop an intuitive sense of how minor angle adjustments translate into different visual outcomes, giving you more control over both lash curl and eye shape.
Duration control: 10-second rule and overcrimping prevention
Time under tension is one of the most overlooked variables in eyelash curling, yet it has a direct impact on both curl longevity and lash safety. A widely accepted guideline is the “10-second rule”: hold each primary clamp—especially at the roots—for no longer than about 10 seconds. This duration is usually sufficient to reshape the keratin bonds when combined with correct pressure and angle, without subjecting the lash to prolonged stress. For follow-up clamps at the mid-lengths and tips, shorter holds of 3–8 seconds are often adequate.
Overcrimping occurs when duration, pressure, or both exceed what the lash can comfortably tolerate, resulting in sharp bends, visible creases, or even partial breakage along the shaft. If you notice a clear 90-degree angle instead of a smooth curve, your lashes have likely been held too long or squeezed too tightly. To prevent this, err on the side of shorter durations and evaluate the curl after each step, only repeating if absolutely necessary. Remember, a slightly softer curl that preserves lash health is far preferable to an aggressive bend that compromises both appearance and long-term strength.
Post-curl lash setting and longevity enhancement
What you do immediately after curling is crucial for locking in a long-lasting lash lift that withstands humidity, natural oils, and daily movement. Think of this stage as “setting” your curl in place, much like fixing a hairstyle with a light mist of hairspray. For many people, the most effective strategy is to apply a thin coat of lightweight, curl-supporting mascara right after curling, while the lashes are still in their newly reshaped position. Waterproof or water-resistant formulas are particularly helpful for straight or heavy lashes because they dry quickly and create a flexible film that reinforces the upward curve.
To avoid undoing your hard work, focus the bulk of the mascara at the roots and mid-lengths, using a gentle wiggling motion to support lift without overloading the tips. Applying too much product to the ends can weigh them down and cause the curl to droop, especially on fine lashes. Some professionals also recommend a strategic approach called “reverse layering”: start with a clear, lightweight setting mascara or primer, allow it to become tacky, and then follow with a single coat of your preferred mascara. Whichever method you choose, allow the product to dry fully before blinking excessively or applying additional eye makeup that might disturb the fresh curl.
Troubleshooting common curling failures and lash breakage prevention
Even with ideal tools and solid technique, you may still encounter days when your eyelash curler seems to stop working or your curl collapses by midday. Troubleshooting these issues involves a combination of visual assessment, habit analysis, and sometimes small but important adjustments to your products. Ask yourself questions like: are your pads due for replacement, have you recently changed mascara formula, or are you sleeping in a way that flattens your lashes overnight? By identifying the specific cause, you can apply targeted solutions that restore long-lasting lift without resorting to more pressure or riskier methods.
Identifying over-processing: crimp marks and structural damage assessment
Signs of over-processing often show up first as visible “crimp marks”: sharp angles or lines across the lash instead of a uniform curve. These creases indicate that the lash has been bent beyond its elastic limit, much like folding a piece of metal repeatedly at the same point. Over time, these weakened points can lead to fraying, split ends, or complete breakage near the bend. If you notice lashes that appear shorter than usual or have irregular, jagged tips, structural damage may already be present.
To assess the extent of damage, gently brush through your lashes with a clean spoolie and observe how they move. Healthy lashes bend and spring back with a smooth, cohesive motion, whereas over-processed lashes may feel stiff, uneven, or prone to shedding with minimal contact. In such cases, the priority should shift from maximal curl to restoration: reduce the frequency and intensity of mechanical curling, avoid heated tools, and focus on conditioning and growth-supporting products. Ignoring these early warning signs and continuing to curl aggressively can ultimately thin the lash line and make long-lasting curl even harder to achieve.
Mascara timing: wet formula application and curl preservation
The timing of mascara application in relation to curling is another frequent source of curl failure and lash damage. Curling lashes after mascara has dried may seem like a shortcut to extra lift, but it effectively glues the lash to the curler pad, increasing the risk of snapping or pulling out hairs from the follicle. The ideal sequence is always to curl first on clean, dry lashes, then apply mascara while the lash structure is still freshly shaped. This approach allows the mascara to act like a setting agent rather than a barrier.
Formula texture also matters: very wet mascaras can temporarily relax a freshly created curl before they dry, leading to droop or uneven lift. If you notice this pattern, try gently blotting excess product from the wand with a tissue, or switch to a slightly drier formula such as a waterproof or “curl-hold” mascara. Allow each coat to become tacky rather than fully dry before adding another, and avoid returning to the curler once any product has set. Respecting this mascara timing helps you maintain a long-lasting lash curl whilst dramatically reducing the likelihood of breakage.
Environmental factors: oil-based products and curl regression
Environmental and skincare-related factors can subtly sabotage curl retention, even when your eyelash curler technique is flawless. Oil-based cleansers, rich eye creams, and facial oils can migrate onto the lash line, softening the mascara film and increasing the weight on each lash. Over the course of the day, this combination of added weight and reduced structural rigidity causes the curl to relax and fall. If you often find that your lashes look perfectly lifted in the morning but almost straight by afternoon, product migration may be the hidden culprit.
To counteract this, apply emollient eye creams and oils sparingly and keep them at least a few millimetres away from the lash roots, especially during daytime wear. Opt for oil-free or long-wear eye makeup removers around the lash area if you plan to recurl during the day, and consider using a lash primer that creates a barrier between skincare and mascara. Humidity and sweat can also contribute to curl regression, particularly in warm climates, so pairing your eyelash curler routine with a humidity-resistant mascara becomes even more important. Small adjustments to your surrounding routine can make a noticeable difference in how long your curl truly lasts.
Recovery protocols for damaged lashes: peptide serums and conditioning treatments
When lashes show clear signs of stress—excessive shedding, brittleness, or broken ends—a structured recovery protocol is essential before returning to intensive curling. Peptide-based lash serums are particularly valuable here, as they support the follicle environment and may improve the appearance of density and resilience over time. Ingredients such as biotinoyl tripeptide-1, panthenol, and botanical extracts work together to maintain moisture levels and reinforce the lash shaft, making it more resistant to daily wear and mechanical styling. Consistent nightly use, typically for 8–12 weeks, is needed to see meaningful improvements.
Complement serum use with simple, protective habits: avoid waterproof mascara during the recovery period unless absolutely necessary, as its removal can be more abrasive; replace aggressive rubbing with gentle, downward strokes using cotton pads soaked in a suitable remover; and reduce curling frequency to only special occasions or soft, minimal-pressure techniques. You may also incorporate a conditioning “lash mask” once or twice a week, using products formulated with nourishing oils or ceramides designed for eye-area safety. By prioritising repair and respecting the natural growth cycle, you give your lashes the opportunity to regain strength—ultimately making your future curls not only longer-lasting, but also far safer to achieve.