Eye make-up remains one of the most transformative elements of cosmetic artistry, capable of reshaping facial proportions, enhancing natural features, and expressing personal style with remarkable precision. The delicate skin surrounding the eyes presents unique challenges—thin, prone to creasing, and requiring specialised techniques that differ fundamentally from face application. Understanding the interplay between pigment formulation, brush selection, and anatomical variation separates adequate application from truly masterful results. Whether you’re seeking a natural enhancement for daily wear or dramatic theatrical impact, the principles of effective eye make-up rest upon anatomical knowledge, colour theory comprehension, and meticulous technique execution that professionals spend years refining.
The contemporary eye make-up landscape has evolved dramatically, with innovations in formulation chemistry delivering unprecedented longevity whilst advanced application methods enable effects previously achievable only through professional intervention. Yet despite this accessibility, many enthusiasts struggle to translate tutorial inspiration into practical success, often due to fundamental gaps in understanding how eye anatomy influences product performance and placement strategy.
Essential eye anatomy and skin types for targeted Make-Up application
Before selecting your first eyeshadow palette or eyeliner pencil, a thorough understanding of ocular anatomy proves indispensable. The orbital structure—comprising the brow bone, mobile lid, crease, and lower lash line—varies considerably between individuals, with these variations dictating which techniques will flatter and which will inadvertently emphasise unfavourable proportions. The skin surrounding the eyes is approximately 40% thinner than facial skin elsewhere, containing fewer sebaceous glands yet paradoxically experiencing higher moisture evaporation rates. This unique composition explains why eye make-up requires specialised primers and setting techniques that wouldn’t be necessary for cheek or forehead application.
The periorbital area’s delicate nature means that product selection must account for both immediate application properties and long-term skin health considerations. Formulations containing excessive alcohol or harsh preservatives can accelerate the appearance of fine lines, whilst overly emollient products may migrate into the waterline, causing irritation. Professional make-up artists recognise that successful eye make-up begins not with colour selection but with proper skin preparation, creating an optimal canvas that enhances pigment adhesion whilst protecting the vulnerable eye area from potential irritants.
Identifying hooded, almond, monolid, and Deep-Set eye shapes
Eye shape classification provides the foundational framework for all subsequent make-up decisions. Hooded eyes, characterised by excess skin folding over the crease when eyes are open, require strategic placement that positions colour above the natural fold to ensure visibility. Approximately 35% of individuals possess some degree of hooding, which can be congenital or develop with age as collagen production diminishes. For hooded eyes, traditional crease placement proves ineffective; instead, creating a “false crease” slightly above the natural fold ensures that carefully blended gradients remain visible when eyes are open.
Almond eyes, considered the most balanced shape, feature slightly upturned outer corners with visible crease definition. This shape accommodates virtually all make-up techniques without requiring significant adaptation. Monolid eyes, prevalent among East Asian populations, lack a defined crease entirely, presenting a smooth surface from lash line to brow bone. This structure benefits from gradient techniques that create dimensional illusion through strategic light and shadow placement. Deep-set eyes sit further back in the orbital socket, with prominent brow bones that can cast shadows across the lid. These eyes require careful highlight placement on the mobile lid to bring the eye forward optically, counteracting the natural recession that can make eyes appear smaller or tired.
Assessing eyelid texture and oiliness for primer selection
Eyelid characteristics extend beyond shape to encompass texture and oil production levels, which dramatically influence product performance and longevity. Oily lids, often accompanying combination or oily facial skin types, secrete sufficient sebum to break down even long-wearing formulations within hours. These lids require mattifying primers containing silica or kaolin clay derivatives that absorb excess oil whilst creating a slightly tacky surface for enhanced pigment adhesion. Conversely, dry or mature lids benefit from hydrating primers incorporating hyaluronic acid or glycerin, which prevent powdery eyeshadows from appearing patchy or
exaggerating fine lines. In these cases, a thin layer of hydrating eye cream allowed to absorb fully, followed by a smoothing primer, will minimise texture without compromising eyeshadow grip. For highly textured lids with pronounced creasing, choose thinner formulas and build colour gradually—thick, creamy shadows are more likely to gather in lines. Always set cream products lightly with a finely milled translucent powder along the crease area if you struggle with midday creasing.
Sensitive eyes or contact lens wearers must also factor in potential reactivity when selecting primers and bases. Fragrance-free and ophthalmologist-tested formulas significantly reduce the risk of irritation, especially when applied close to the waterline. If you frequently experience watering or redness, avoid primers containing denatured alcohol near the lash line and instead rely on long-wear, silicone-based formulas that lock eye make-up in place. Ultimately, your primer should behave like a tailored undergarment for your eye look: invisible, supportive, and chosen specifically for your eyelid’s unique behaviour.
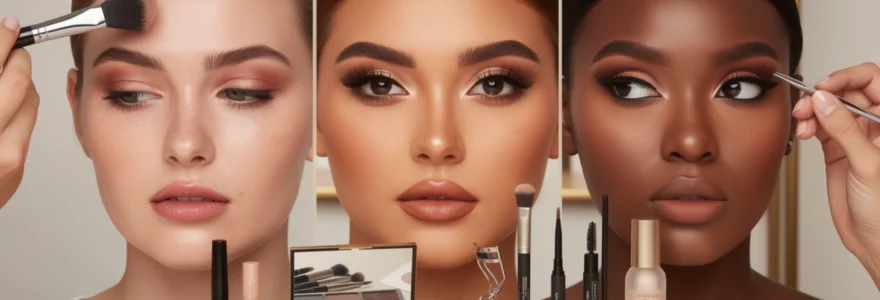
Understanding undertones and melanin levels for shade matching
Colour payoff and shade harmony depend not only on the pigment in the pan but also on the undertone and melanin level of your skin. Individuals with higher melanin often find that pastel or very light eyeshadows appear chalky or barely visible, while rich jewel tones and metallics sing against deeper complexions. Those with fair or light skin may discover that intensely saturated shades can overwhelm the eye area unless carefully diffused, making mid-tone neutrals and soft cool tones ideal for everyday eye make-up looks. Undertone—cool, warm, or neutral—further refines which colours appear harmonious versus jarring.
To determine your undertone, examine how your skin reacts to jewellery and sunlight: do silver tones and blue veins flatter you more (cool), or do gold jewellery and greenish veins look better (warm)? Once identified, you can select eyeshadow palettes that echo or intentionally contrast your undertone for complementary or high-impact looks. Warm undertones pair beautifully with bronzes, coppers, and warm browns, while cool undertones shine with taupes, plums, and charcoal greys. Deeper skin tones with cool undertones often excel with sapphire, emerald, and amethyst hues, whereas warm deep complexions glow with burnt orange, terracotta, and gold. Matching your eye make-up to your undertone doesn’t mean restricting creativity; rather, it provides a reliable starting point before you experiment with bolder artistic choices.
Recognising orbital bone structure and crease placement
Orbital bone prominence and natural crease placement heavily influence where eyeshadow should begin and end. The brow bone forms a natural highlight zone where light colours enhance lift, while the hollow between the brow bone and mobile lid marks your crease region—even if your actual fold is hidden or minimal. For some, especially with deep-set or prominent brow bones, this hollow sits quite high, meaning conventional transition shade placement must be elevated accordingly. If you follow generic diagrams without respecting your own bone structure, gradients may vanish when you open your eyes or create an unintended droopy effect.
To map your structure, tilt your head back slightly in a mirror and gently trace the curve where your eyeball sinks under the bone using a clean brush handle. This is your true crease guideline, distinct from any fine lines or hooding. Place mid-tone transition shades just above this line for hooded or deep-set eyes, and directly along it for almond or round eyes. Lightest shimmer or satin shades belong on the highest point of the brow bone (avoiding overly frosty formulas in textured skin), while deepest tones sit near the outer third of the eye where the bone naturally recedes. Thinking of your eye as a three-dimensional sculpture rather than a flat canvas ensures that every placement decision respects your unique architecture.
Advanced eyeshadow techniques using the cut crease and halo methods
Transition shade blending with fluffy blender brushes
Complex eye looks, including cut creases and halo eyes, live or die by their transition shades. A transition shade is typically a mid-tone colour, slightly deeper than your natural skin tone, that softens the edge between your darker crease shadows and your bare or highlighted brow bone. Using a fluffy blender brush with longer, flexible bristles, you sweep this shade in broad, windshield-wiper motions through the crease area, then in small circular motions to diffuse any harsh lines. The goal is a soft gradient that looks like a natural shadow rather than a visible stripe of colour.
Why is this step so crucial for advanced eye make-up? Without a properly blended transition, a cut crease can appear stark and disconnected, and a halo eye can look patchy instead of luminous. Choose matte or soft satin formulas for this task; overly shimmery shades tend to emphasise texture and are harder to blend seamlessly. Start with very little product on your brush, tapping off excess before touching the lid—adding pigment is easy, but removing it without disturbing your base is far more difficult. As a rule of thumb, the lighter your skin tone, the more subtle your transition shade should be; deeper complexions may require richer caramel, chestnut, or cocoa hues to achieve the same gradient effect.
Executing the wayne goss method for pigment intensification
For those who crave high-impact eye make-up without sacrificing blendability, the Wayne Goss method offers a professional-level solution. Rather than loading a dense brush and pressing a thick layer of eyeshadow onto a wet or tacky base, this technique relies on ultra-thin layers built gradually. You start with a well-set base—usually primer topped with a light dusting of translucent powder—then use a small, soft brush to apply a whisper-thin veil of eyeshadow. After each layer, you blend the edges gently before adding more pigment directly where you want intensity.
This approach mirrors how painters glaze colour: multiple sheer layers build depth and luminosity without streaks or patchiness. For bold smokey eyes or cut creases, you can concentrate deeper shades at the outer corner or along the crease using small, controlled motions, then softly diffuse upward into your transition shade. Because each layer is so thin, the shadow adheres more evenly and resists creasing, even on oily or hooded lids. If you’ve ever wondered why your bold colours fade or look muddy, experimenting with this gradual build-and-blend technique can transform your eye make-up results.
Creating depth with the outer-v technique and smoky gradients
The outer-V technique is a cornerstone of sophisticated eye make-up, particularly for creating depth and lift. Imagine a sideways “V” or small triangle at the outer corner of your eye: one line follows the upper lash line, and the other traces slightly into the crease. By placing your deepest matte shade in this zone and blending inward, you create the illusion of a more elongated and lifted eye shape. This is especially flattering for round or close-set eyes, as it visually pulls attention outward.
To build a smoky gradient, start with your transition shade through the crease, then add a slightly deeper colour to the outer third of the lid. Finally, place your darkest tone in the outer-V area using a smaller, more precise brush. Blend the edges with a clean fluffy brush, keeping the majority of the pigment near the outer corner to avoid closing off the eye. Think of this process like shading in a charcoal sketch: the heaviest pressure stays at the edges while the centre remains lighter for balance. For an advanced twist, you can connect the outer-V to the lower lash line with the same deep shade, creating a cohesive wraparound smokey effect that still feels wearable.
Mastering the reverse smoky eye for daytime wear
A traditional smoky eye concentrates depth and darkness on the upper lid, which can feel intense for daytime or mature eyes. The reverse smoky eye flips this convention by placing the smudged, deeper tones primarily along the lower lash line while keeping the upper lid lighter and more open. This technique works especially well if you have hooded lids or prefer minimal product on the mobile lid but still want a captivating eye make-up look. It also helps avoid the heaviness that sometimes accompanies dark colours above the crease.
To create a reverse smoky eye, begin with a soft wash of neutral shadow on the upper lid and a subtle transition shade in the crease. Then, take a pencil or kohl liner along the lower lash line, focusing on the outer two-thirds, and smudge it with a small, dense brush. Layer a coordinating powder shadow over the liner to set and diffuse it, gradually smoking it out for a hazy effect. Keep the inner corner bright with a light, reflective shade to prevent the look from appearing tired. The result is an eye that appears larger and more awake, with drama focused where it’s least likely to interfere with your natural lid movement.
Precision eyeliner application with gel, liquid, and kohl formulations
Achieving the perfect wing using the tape method
Winged eyeliner remains one of the most requested eye make-up techniques, yet it’s also among the most intimidating. The tape method offers a simple, physics-based cheat for creating symmetrical wings using gel, liquid, or even eyeshadow as liner. By placing a small strip of cosmetic-safe tape or a repositionable adhesive along the outer corner of the eye, angled toward the tail of the brow, you create a crisp boundary that guides your liner flick. The tape acts like a stencil edge, catching any wobbles or excess product.
To use this method effectively, first ensure the skin is dry and free from heavy emollients so the tape adheres without slipping. Apply your liner starting from the outer corner along the tape edge, drawing inward towards the centre of the lash line in short strokes. Once satisfied with the angle and thickness, gently peel away the tape to reveal a sharp, clean wing. You can then connect this wing to a finer line across the rest of the lash line. Over time, as your muscle memory improves, you may rely less on physical guides—but in the learning phase, the tape method dramatically reduces frustration and uneven wings.
Tightlining the upper waterline for lash density illusion
Tightlining, or invisible liner, involves placing pigment directly along the upper waterline (the inner rim between lashes and eye) to create the impression of thicker, darker lashes without an obvious liner line. This is particularly effective for natural eye make-up looks, mature eyes where heavy liner can be unflattering, or anyone with sparse lashes. Kohl pencils and some gel liners are best suited to this technique, as they glide smoothly and are often formulated for the waterline.
To tightline safely, gently lift your upper lid with a clean finger and look down into a mirror. Using a well-sharpened but not sharp pencil, wiggle the product into the spaces between the lashes along the upper rim, focusing on the outer two-thirds for the most eye-opening effect. Avoid heavily lining the lower waterline if your eyes are small or prone to redness, as this can visually shrink the eye. When done correctly, tightlining adds subtle definition that makes mascara appear more impactful, as if you naturally have a fuller lash line.
Creating graphic liner looks with angled brushes and stencils
Graphic liner, from negative-space wings to floating creases, has become a key trend in editorial and social media make-up. Achieving these precise, architectural shapes requires steady hands and the right tools—most notably fine-tipped or angled brushes paired with long-wear gel or liquid formulas. Angled brushes allow you to stamp and drag sharp lines, much like using a calligraphy pen, while stencils or reusable guides help maintain symmetry between both eyes. If you struggle to freehand intricate designs, stencils can remove much of the guesswork.
Begin by sketching your intended shape with a light, removable medium such as a flesh-toned pencil or a very faint eyeshadow. Once you’re satisfied with the placement, trace over the guide with your chosen liner using small, controlled strokes rather than trying to draw the entire shape in one pass. Clean up edges with a fine brush dipped in concealer for a professional finish. Graphic liner looks are essentially eye make-up as illustration: think of your lid as a page where negative space and sharp lines work together to create visual drama.
Mastering the fox eye lift technique with strategic liner placement
The fox eye trend focuses on elongating and subtly lifting the outer corners of the eyes, emulating a sleek, feline shape. Unlike a traditional winged liner that often curves upward from the lash line, fox eye liner tends to be straighter and more horizontal, extending slightly past the outer corner and sometimes connecting to a small inner-corner flick. This approach visually stretches the eyes sideways, making them appear more almond-shaped and lifted.
To create this effect, keep the liner on the upper lash line very thin at the inner corner, gradually thickening only slightly toward the outer third. Extend a straight, softly angled line outward, following the natural slope of your lower lash line rather than aiming toward the eyebrow tail. For extra lift, lightly connect the outer wing to a smudged shadow or liner along the lower lash line, focusing on the outer half and leaving the inner portion bare or brightened. Pairing this with well-groomed, slightly elongated brow tails enhances the overall lifted illusion without requiring invasive procedures.
Professional lash enhancement through curling, layering, and false lash integration
Lashes act as the final frame for your eye make-up, and mastering their enhancement can make even simple looks appear professional. Start with a high-quality lash curler, positioning it at the base of clean, dry lashes and gently pulsing for a few seconds rather than clamping hard. For stubbornly straight lashes, repeat this process in two or three sections along the length of the lashes to create a natural-looking curve instead of a sharp bend. Always curl before applying mascara to avoid lash breakage and tool contamination.
When it comes to mascara, layering strategically is more effective than applying endless coats of a single formula. You might begin with a lengthening or defining mascara to separate and extend, then follow with a volumising formula focused at the roots for fullness. Allow each coat to become slightly tacky before adding the next to minimise clumping. If you accidentally overload product, a clean spoolie or lash comb can rescue the look by removing excess and re-separating lashes.
False lashes offer another level of impact, from delicate half-lashes for subtle outer-corner lift to full strips or individual clusters for stage-ready drama. Beginners often find half-lashes easier to place, as they align naturally with the outer lash line and avoid the tricky inner corner. Trim strip lashes from the outer end to match your eye width, then apply a thin line of lash glue and wait until it turns tacky before positioning. Look down into a mirror, place the centre first, then secure inner and outer corners with tweezers or a lash applicator for precise placement.
For the most natural integration, press your real and false lashes together with your fingertips once the glue has dried, then apply a light coat of mascara to marry them. If you prefer a more comfortable and customisable option, individual or cluster lashes can be dotted along the lash line where you need extra fullness. Always remove falsies gently by softening the glue with a water-based eye make-up remover, and resist the temptation to pull them off dry, which can damage your natural lashes over time.
Colour theory application for complementary and monochromatic eye looks
Colour theory might sound intimidating, but in practice it’s the roadmap that helps you choose eyeshadow and liner shades that enhance your natural eye colour and overall look. At its core, the colour wheel shows which hues sit opposite each other (complementary) and which sit side by side (analogous or monochromatic). Complementary colours—such as orange versus blue or purple versus yellow—create high contrast and make each other appear more vibrant. This is why copper and rust tones make blue eyes look electric, and plums or burgundies intensify green or hazel eyes.
Monochromatic eye make-up, on the other hand, uses variations of the same hue—light, medium, and dark—to build dimension without strong contrast. This approach is ideal for sophisticated, everyday looks and for situations where you want your eye make-up to complement, rather than compete with, bold lips or cheeks. For example, a soft taupe lid, medium brown crease, and deeper espresso outer corner compose a neutral monochromatic brown scheme suitable for most complexions. Adjusting warmth or coolness within that range allows you to harmonise with your undertone and wardrobe.
When designing a complementary eye look, start by identifying your natural eye colour and locating its opposite on the colour wheel. Brown eyes are technically neutral and can carry almost any shade, but they particularly shine with navy, cobalt, emerald, and warm golds. Blue eyes glow against copper, peach, and warm browns, while green and hazel eyes respond beautifully to plum, cranberry, and rosy bronze. If you’re uncertain, ask yourself: do you want your eye colour or your eyeshadow to be the star? Complementary schemes amplify the iris, while contrasting or experimental colours shift attention to the artistry of the make-up itself.
Texture also plays a critical role in colour theory-based eye make-up. Matte shades recede and sculpt, making them ideal for crease work and outer corners, while shimmers and metallics advance visually, drawing attention to the centre of the lid or inner corner. Combining both within your chosen colour palette adds dimension, much like combining shadows and highlights in photography. By thoughtfully balancing hue, saturation, and finish, you can create eye looks that feel cohesive, intentional, and tailored to your features rather than randomly assembled.
Longevity optimisation with setting sprays, eye primers, and powder techniques
Creating a captivating eye look is only half the equation; ensuring it lasts through heat, humidity, and long wear is where professional techniques truly matter. Eye primers form the first line of defence by gripping pigment and controlling oil, but they work best when paired with strategic powdering and setting. After applying your primer and any cream-based products, lightly set the crease and brow bone area with a translucent powder using a small, fluffy brush. This reduces the risk of shadow skipping or grabbing in uneven patches—a common issue on very oily or textured lids.
Layering creams and powders intentionally can also extend longevity. For example, using a cream shadow or pencil in a similar shade as an eyeshadow base creates a coloured “adhesive” that locks powder pigments in place, particularly for smokey eyes or vibrant hues. This is similar to using double-sided tape under wallpaper: the extra grip keeps everything from sliding as the day progresses. Avoid overloading the lid with thick creams, however, as they can crease under excess product weight; thin layers remain key.
Setting sprays provide the final seal, but technique matters. Rather than drenching your face at close range, hold the bottle 20–30 centimetres away and mist in an “X” and “T” pattern, allowing a fine veil to settle over the skin and eye area. Some artists even lightly spritz their eyeshadow brush with setting spray before picking up metallic or shimmer shadows to intensify payoff and adherence. If you have sensitive eyes, keep them gently closed during application and choose formulas designed for long wear without heavy alcohol content.
Touch-up strategy further supports an all-day eye make-up look. Keeping cotton buds, a miniature concealer, and a compact powder on hand allows you to address minor smudges or fading without removing everything. If your eyeliner tends to transfer to the upper lid, consider setting the area just above your lash line with a skin-toned shadow or translucent powder as a barrier. Ultimately, longevity isn’t about using the heaviest products; it’s about layering thoughtfully, respecting your skin type, and locking in your artistry so your eyes remain as captivating at the end of the day as they were at the beginning.