The artistry of eyeliner application transcends mere cosmetic enhancement, serving as a powerful tool for facial symmetry and optical illusion. Your eye shape fundamentally determines how eyeliner will appear on your face, making it essential to understand the unique characteristics of your ocular anatomy before selecting application techniques. Professional makeup artists consistently emphasise that one size does not fit all when it comes to eyeliner, as each eye shape requires specific placement strategies to achieve optimal results.
Modern cosmetic science has identified numerous distinct eye shapes, each presenting unique challenges and opportunities for eyeliner application. From hooded eyes that require strategic visibility techniques to almond-shaped eyes that accommodate virtually any style, understanding your eye morphology enables you to make informed decisions about product selection and application methods. The precision required for effective eyeliner application demands both technical knowledge and practical understanding of how different formulations interact with various eye shapes.
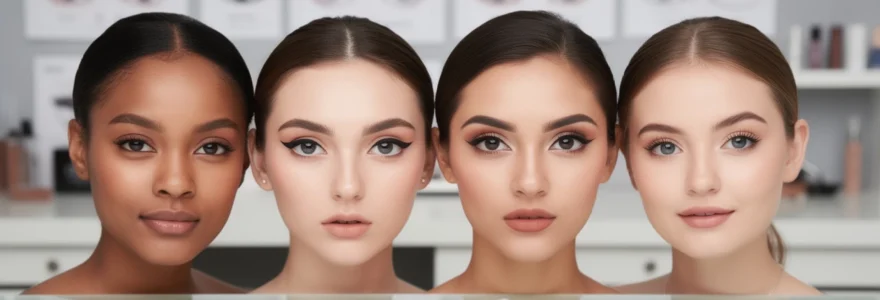
Understanding eye shape anatomy for precise eyeliner application
Identifying your eye shape requires systematic observation of several anatomical features, including the visibility of your eyelid crease, the position of your outer corners, and the relationship between your eye width and height. Professional makeup artists utilise specific measurement techniques to categorise eye shapes accurately, considering factors such as canthal tilt, socket depth, and lid mobility. These measurements directly influence how eyeliner will appear when your eyes are both open and closed, making accurate identification crucial for achieving desired aesthetic outcomes.
The complexity of eye shape analysis extends beyond simple categorisation, as many individuals possess combination features that require hybrid application techniques. Understanding the interplay between different anatomical characteristics enables you to adapt professional techniques to your unique facial structure. This comprehensive approach ensures that your eyeliner enhances rather than detracts from your natural beauty, creating harmonious proportions that complement your overall facial geometry.
Identifying hooded eyes and monolid characteristics
Hooded eyes present a distinctive challenge in eyeliner application due to the excess skin that drapes over the mobile eyelid, often obscuring traditional eyeliner placement when the eyes are open. This anatomical feature requires strategic positioning of eyeliner to ensure visibility and prevent smudging against the overhanging skin. The key identifier for hooded eyes is the minimal or complete absence of visible eyelid space when looking straight ahead in a mirror, with the crease appearing to sit very close to or touching the lash line.
Monolid eyes, characterised by the absence of a defined crease from the lash line to the brow bone, require different considerations for eyeliner application. This eye shape provides a smooth canvas that extends directly from the lashes to the eyebrow, offering unique opportunities for creative eyeliner designs while presenting specific challenges for traditional Western eyeliner techniques. Understanding the distinction between hooded and monolid eyes is crucial, as application strategies differ significantly between these two eye shapes despite their superficial similarities.
Recognising almond eye shape proportions and angles
Almond-shaped eyes represent the classical ideal in Western beauty standards, characterised by their oval configuration with gently tapered ends and a visible crease that creates natural depth and dimension. The outer corner of almond eyes typically sits slightly higher than the inner corner, creating an inherent lift that enhances the eye’s natural beauty. This eye shape provides the most versatile canvas for eyeliner application, accommodating everything from subtle tightlining to dramatic winged designs with equal effectiveness.
The proportional balance of almond eyes allows for experimentation with various eyeliner styles without overwhelming the natural eye shape or creating unflattering distortions. Professional makeup artists often use almond eyes as the benchmark for technique development, as the principles that work for this eye shape can be adapted for other configurations. The inherent symmetry of almond eyes makes them particularly responsive to both conservative and avant-garde eyeliner applications, providing endless creative possibilities for personal expression.
Distinguishing round eye curvature and iris exposure
Round eyes exhibit pronounced curvature with significant iris exposure, creating an appearance of openness and alertness that many find appealing. The height and width measurements of round eyes are approximately equal, resulting in a circular appearance that differs markedly from the elongated oval of almond-shaped
eyes. When you look straight ahead, you will usually see a clear ring of white (sclera) above or below the iris, which contributes to that wide-eyed, doll-like effect. Unlike almond eyes, where the outer corners taper and elongate the shape, round eyes maintain more uniform curvature from inner to outer corner, giving them a more circular silhouette.
From an eyeliner perspective, this additional iris exposure means that any line placed along the upper or lower lash line will dramatically influence how open or elongated the eye appears. Thicker lines through the centre of the lash line can emphasise roundness, while extended wings and shading at the outer third visually stretch the shape horizontally. Understanding how much iris is visible when you look straight ahead is therefore a reliable indicator that you are working with a round eye shape rather than an almond configuration.
Assessing downturned and upturned eye canthal tilt
Downturned and upturned eyes are defined by the angle of the outer corner, known as the lateral canthus, in relation to the inner corner, or medial canthus. To assess your canthal tilt, imagine a straight horizontal line drawn from the inner corner to the outer corner while you look directly into a mirror. If the outer corner sits lower than this imaginary line, your eyes are considered downturned; if it sits higher, you have an upturned eye shape.
This seemingly subtle difference in canthal tilt has a profound impact on how eyeliner reads on the face. On upturned eyes, eyeliner that follows the natural lash line will automatically create a lifted, feline effect, while the same approach on downturned eyes can exaggerate a “sad” or tired appearance. When choosing eyeliner placement for your eye shape, paying attention to this tilt allows you to either enhance your natural lift or subtly correct and balance a downward slant through strategic upward flicks and controlled thickness.
Measuring deep-set versus prominent eye socket depth
Socket depth refers to how far back or forward the eyeball sits within the orbital bone and is a key factor in eyeliner visibility and balance. Deep-set eyes are positioned further back in the socket, often with a more pronounced brow bone and shadowed crease when viewed from the side. Prominent or protruding eyes, by contrast, appear to project slightly forward, with more of the eyeball visible beyond the plane of the surrounding bone structure.
You can quickly assess your own socket depth by looking at your profile or gently placing a straight object, such as a makeup brush, vertically against your brow and cheekbone. If the eyeball sits noticeably behind this line, you likely have deep-set eyes; if it touches or appears to extend beyond, your eyes are more prominent. This measurement matters for eyeliner because heavy, dark liner can cause deep-set eyes to recede further, whereas the same technique can help visually “push back” prominent eyes. Understanding this relationship allows you to choose liner intensity, placement, and finish that either brings the eyes forward or softens their projection.
Professional eyeliner formulation types and application techniques
Once you understand your eye shape anatomy, the next step is selecting the right eyeliner formula and mastering its application. Different textures behave very differently on the skin: gel liners offer control and longevity, liquid liners deliver intense precision, pencils provide softness and blendability, and felt-tip pens bridge the gap between graphic definition and ease of use. Choosing the right formula is a bit like choosing the right brush for a painting; the same design can look radically different depending on the medium you use.
Professional makeup artists often keep multiple eyeliner types in their kit, switching between them depending on the client’s eye shape, skin type, and desired finish. For example, a waterproof gel might be essential for tightlining hooded eyes, while a soft kohl pencil can be ideal for smudging around round or prominent eyes. As you read through each formulation below, consider not only the effect you want to achieve but also how your unique eye shape will influence application and wear time.
Gel eyeliner precision with urban decay 24/7 and bobbi brown Long-Wear
Gel eyeliner, usually packaged in pots or twist-up pencils, combines creamy glide with impressive staying power, making it a favourite for both everyday definition and editorial looks. Products such as Urban Decay 24/7 gel formulas and Bobbi Brown Long-Wear Gel Eyeliner are renowned for their smooth application and resistance to smudging once set. Because gel liners remain workable for a short period before locking in place, they are ideal for creating soft wings, diffused lines, and controlled tightlining on a wide range of eye shapes.
For hooded or oily lids, gel eyeliner offers a strategic advantage: you can press pigment directly into the lash line using an angled or ultra-fine brush, then gently set the edges with a matching eyeshadow to reduce transfer onto the upper lid. If you have almond or upturned eyes and want a classic wing, gel allows you to “sketch” the shape with more forgiveness than a liquid liner, cleaning the edge with a cotton bud dipped in micellar water. On deep-set or mature eyes where skin texture can cause skipping, the buttery consistency of gel glides over fine lines more easily than a stiff felt tip, producing a more even, flattering result.
Liquid eyeliner mastery using stila stay all day and KVD beauty tattoo liner
Liquid eyeliner is the go-to choice for crisp, high-impact lines and ultra-defined wings, particularly on almond and upturned eye shapes that naturally suit graphic looks. Formulas like Stila Stay All Day Waterproof Liquid Eyeliner and KVD Beauty Tattoo Liner are industry staples thanks to their saturated pigment, slim brush tips, and long-wearing properties. These pens allow you to draw razor-sharp edges and micro-thin lines that remain visible even on eyes with minimal lid space.
However, liquid liner is also the least forgiving formula for many eye shapes, especially if you have hooded, round, or slightly textured lids. To master liquid application, treat it like calligraphy: anchor your elbow on a table, work in short strokes rather than one sweeping line, and keep your eyes open and relaxed while mapping your shape. If your eyeliner tends to disappear into a fold, first sketch the wing with your eye open, following the direction of your lower lash line, then fill in the gap with your eye closed. This technique ensures that the final wing will look intentional and continuous when your eyes are open, rather than broken or distorted by hooding.
Pencil eyeliner blending with MAC eye kohl and charlotte tilbury rock ‘N’ kohl
Pencil eyeliners, including classic kohl formulas like MAC Eye Kohl and hybrid long-wear pencils such as Charlotte Tilbury Rock ‘N’ Kohl, provide unmatched versatility for everyday makeup. Their softer texture makes them ideal for smudging along the lash line, creating subtle definition that complements round, prominent, or deep-set eyes without overwhelming the shape. Because pencil liner is less rigid than liquid or felt-tip pens, it is also easier to correct mistakes, making it a practical starting point if you are still learning how to map eyeliner to your eye shape.
On round or close-set eyes, you can use a pencil to concentrate depth on the outer third of the upper and lower lash lines, then blend outwards with a small smudge brush to elongate the eye. For hooded or monolid shapes, a waterproof pencil pressed into the upper waterline (tightlining) will make the lashes appear fuller without stealing valuable lid space. If you prefer a smoky, editorial effect on prominent eyes, layer your pencil first, then diffuse it with a synthetic brush and set with a coordinating eyeshadow to prevent migration throughout the day.
Felt-tip precision application with fenty beauty flyliner and NYX epic ink
Felt-tip eyeliners combine the graphic intensity of liquid with the control of a pen, making them a popular choice for at-home winged liner. Options such as Fenty Beauty Flyliner and NYX Epic Ink Liner feature flexible, tapered tips that respond to pressure: a light touch delivers a fine line, while increased pressure thickens the stroke. This responsiveness allows you to customise your eyeliner thickness along the lash line, which is particularly helpful for tailoring depth to different eye shapes.
If you have hooded eyes, using a felt-tip pen with your eyes open lets you “map” the wing exactly where it will be visible above the fold—almost like drawing on tracing paper over your natural anatomy. Almond and upturned eyes can benefit from the pen’s precision to emphasise their natural lift, starting with a thin line at the inner corner and gradually pressing harder towards the outer third. On downturned eyes, you can strategically stop the liner just before the outermost lash, then flick the tip upwards at a slightly steeper angle than your natural lash line to create a lifting effect without adding unnecessary weight to the lower outer corner.
Eye shape-specific eyeliner mapping and placement strategies
Knowing which eyeliner formula to reach for is only half the equation; the real transformation happens when you adjust your mapping and placement to respect your specific eye shape. Think of your eyes as architectural structures: certain lines will reinforce their proportions, while others can distort or flatten the design. By strategically deciding where to start, stop, thicken, or lift your eyeliner, you can subtly reshape your eyes to appear more elongated, lifted, or balanced.
Professional makeup artists rarely rely on a single “universal” eyeliner style. Instead, they adapt a core technique to each individual eye, modifying angle, length, and thickness according to the client’s anatomy. Below, we break down eye shape-specific eyeliner strategies you can apply at home, focusing on practical, repeatable steps that complement hooded, almond, round, and downturned eyes. As you experiment, you may discover that your ideal eyeliner look is a hybrid of several methods—this customisation is exactly what makes eyeliner such a powerful tool.
Hooded eye tightlining and visible lid space maximisation
With hooded eyes, the primary goal of eyeliner is to define the lash line and create the illusion of more lid space, rather than covering it. Because the upper lid often folds over the lash line when the eyes are open, traditional thick liner can disappear into the crease or transfer onto the brow bone. Tightlining—applying eyeliner along the upper waterline—solves this by darkening the base of the lashes without taking up any visible lid real estate, instantly making the eyes look more framed and lashes appear denser.
To maximise visible lid space, keep any liner on the upper lid as thin as possible at the inner half of the eye, gradually thickening only towards the outer third. When creating a wing, look straight ahead in the mirror with relaxed eyes and sketch the wing so that its tip sits above the fold, following the angle of your lower lash line rather than the droop of any hooded skin. Once mapped, you can close your eye to connect the wing back to the lash line, forming a small wedge shape that remains visible when your eyes are open. Avoid heavily lining the lower lash line, as this can close off the eye; instead, opt for a soft pencil smudged only on the outer quarter if you want extra definition.
Almond eye classic winged liner extension beyond outer corner
Almond eyes naturally lend themselves to classic winged eyeliner because their slightly lifted outer corners and balanced lid space already resemble a stylised feline shape. To accentuate this, start your liner as a fine line at the inner corner, hugging the lash line and gradually increasing thickness as you approach the outer third. Keeping the inner section delicate preserves the eye’s brightness, while the thicker outer portion enhances the inherent lift and elongation of the almond shape.
For the wing itself, imagine an invisible line extending from your lower lash line towards the end of your brow; this is your ideal guiding angle. Draw a short flick following this direction, then connect the tip back to the thickest part of your upper lash line to create a small triangular wedge. You can adjust the length and height of this extension depending on your desired intensity: a subtle, short wing is ideal for daytime, while a longer, sharper wing adds drama for evening looks. Because almond eyes are so versatile, you can also experiment with double wings or coloured liners along the lower lash line without disrupting the overall balance of the shape.
Round eye elongation through strategic lower lash line definition
With round eyes, the eyeliner objective is often to subtly elongate the shape horizontally while preserving their natural openness. Applying a dark, thick line all the way around the eye can emphasise circularity, making the eyes appear smaller and more bulbous. Instead, focus your depth on the outer halves of both the upper and lower lash lines, leaving the inner corners lighter or even bare to visually “stretch” the eye towards the temples.
Start by lining the upper lash line from roughly the centre of the eye outward, gradually thickening the line as you reach the outer corner and extending it into a modest wing that follows a gentle upward tilt. On the lower lash line, apply a pencil or eyeshadow from the outer third inwards, stopping before you reach the midpoint, then softly smudge to diffuse any harsh edges. This asymmetrical placement creates the illusion that the eye is longer than it is tall, nudging the shape towards an almond-like appearance. If you love the look of liner on the waterline, opt for a nude or soft beige pencil on the lower waterline rather than black, which can crowd the eye and diminish its naturally bright, rounded look.
Downturned eye lifting techniques with upward wing angles
Downturned eyes, where the outer corners sit slightly lower than the inner corners, benefit dramatically from eyeliner strategies that visually lift and rebalance the shape. The key is to avoid following the downward slope of the natural lash line all the way to the end, as this will accentuate the tilt. Instead, stop your upper liner just before the point where the lashes begin to angle down, then redirect the line into a soft upward wing that counteracts the droop.
An effective mapping technique is to look straight ahead and mark a tiny dot where you want the highest point of your wing to sit—usually in line with the outer edge of your iris and angled towards the tail of your brow. Draw a short line up towards this dot from the outer corner, then connect it back to the upper lash line to form a lifted, triangular wing that does not drag the eye downward. Keep the lower lash line very light or completely bare, or simply smudge a soft brown or taupe on the outer quarter only; heavy lower liner, especially towards the inner corner, can pull the eye down visually. Paired with curled lashes and concentrated mascara on the outer upper lashes, this lifted wing technique can make downturned eyes appear more awake and subtly upturned.
Advanced colour theory and pigment selection for different eye colours
Beyond shape and structure, the colour of your eyes plays a critical role in how eyeliner is perceived, influencing contrast, vibrancy, and overall harmony with your complexion. Colour theory teaches us that shades opposite each other on the colour wheel—known as complementary colours—create the strongest visual impact. For eyeliner, this means that choosing hues that contrast with your natural eye colour will make your irises appear brighter and more intense, while analogous shades (colours neighbouring your eye tone on the wheel) produce a softer, more monochromatic effect.
For blue eyes, warm tones such as copper, bronze, rust, and rich browns sit opposite on the colour wheel and amplify the coolness of the iris, making blues appear more vivid. Green or hazel eyes respond beautifully to plums, aubergines, and reddish-browns, which pull out the golden or olive flecks in the iris. Brown eyes, being neutral, are highly versatile: deep navy, emerald, and charcoal can add sophistication, while metallic golds and bronzes create luminosity. If you wear coloured contact lenses or experiment with bold eyeshadow, remember that the perceived eye colour may shift slightly, so adjust your eyeliner accordingly to maintain balance rather than compete with your overall look.
Professional application tools and brush selection methodology
The tools you use to apply eyeliner are just as important as the formula itself, particularly if you want professional-level precision at home. A well-chosen brush can transform a stubborn gel liner into a smooth, controllable medium or turn a pencil line into a perfectly diffused shadow. Generally, you will want at least one fine-tipped liner brush, one angled brush, and one small smudge brush in your kit to cover the majority of eye shape and eyeliner styles.
Fine-tipped brushes, often called detail or liner brushes, are ideal for tightlining hooded eyes or sketching delicate wings on smaller lids where every millimetre of space matters. Angled brushes provide extra stability and control when drawing wings, as their slanted edge helps you align the flick with your lower lash line for symmetrical results on both eyes. A compact smudge brush is invaluable for softening pencil or gel along the lash line, particularly on round, deep-set, or mature eyes where harsh lines can be less flattering. When choosing tools, prioritise synthetic bristles for cream and gel products, as they are less absorbent and easier to clean, ensuring consistent performance and hygiene.
Common eyeliner mistakes and corrective techniques by eye shape
Even with the right products and a solid understanding of your eye shape, eyeliner is a skill that improves with practice—and mistakes are part of the learning curve. Some errors, however, can consistently work against your features, such as overly thick liner on small hooded eyes, dragging heavy pigment along the entire lower lash line of downturned eyes, or closing off round eyes with dark waterline colours. Recognising these patterns allows you to correct them quickly and adjust your technique so that your eyeliner supports rather than fights your natural anatomy.
If you have hooded or small eyes, one of the most common mistakes is applying a solid, thick line from inner to outer corner, which can consume lid space and make the eyes appear more closed. Instead, switch to tightlining and concentrate visible thickness only on the outer third, paired with a subtle wing that sits above the fold. For round eyes, lining the full lower waterline with black can exaggerate roundness and reduce brightness; replacing this with a nude pencil and reserving dark shades for the outer corners will elongate rather than crowd the shape. Downturned eyes often suffer from wings that follow the natural downward lash line—if your liner points towards your cheek rather than your temple, simply remove the tail with a pointed cotton bud and redraw it at a steeper, upward angle. By approaching these corrections analytically, you turn every “mistake” into precise feedback on how to refine your eyeliner strategy for your specific eye shape.