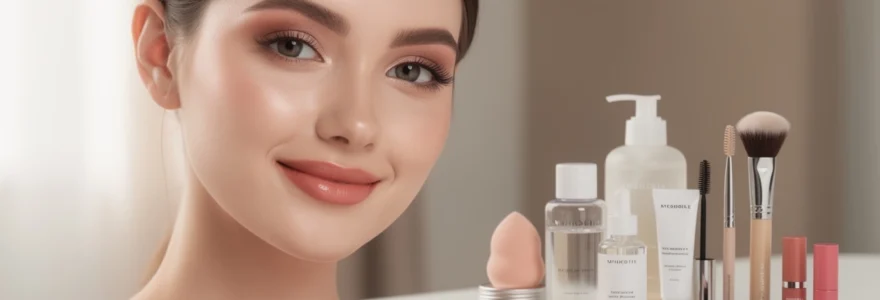
The no-makeup makeup trend has evolved from a fleeting social media phenomenon into a sophisticated beauty philosophy that celebrates natural enhancement over dramatic transformation. This approach to cosmetics focuses on creating an effortlessly polished appearance that suggests you simply woke up with perfect skin, defined features, and a healthy glow. Unlike traditional makeup applications that layer products for full coverage, this technique requires strategic precision and high-quality formulations to achieve what appears deceptively simple.
Professional makeup artists have long understood that creating the illusion of wearing no makeup often requires more skill and technique than applying a full glam look. The challenge lies in achieving flawless coverage while maintaining skin’s natural texture and luminosity. This trend resonates particularly well in today’s beauty landscape, where authenticity and skin health take precedence over heavily contoured and highlighted faces.
Skin preparation techniques for natural canvas enhancement
The foundation of any successful no-makeup makeup look begins long before the first cosmetic product touches your skin. Professional preparation techniques create the optimal canvas that allows subsequent products to blend seamlessly and appear as natural skin enhancements rather than obvious makeup applications.
Double cleansing methods using micellar water and Oil-Based cleansers
The double cleansing method represents the gold standard for preparing skin that will appear naturally radiant under minimal makeup coverage. Begin with micellar water to dissolve surface impurities and makeup residue without disrupting the skin’s natural pH balance. The micelles in these formulations attract dirt and oil particles, creating a gentle yet thorough initial cleanse that prepares the skin for deeper purification.
Following the micellar water application, massage an oil-based cleanser into the skin using upward circular motions. This second cleansing phase removes stubborn impurities lodged within pores while simultaneously nourishing the skin with essential fatty acids. The oil cleansing method proves particularly effective for maintaining skin’s natural moisture barrier, which is crucial for achieving that coveted healthy glow that forms the base of natural-looking makeup.
Exfoliation protocols with AHA and BHA formulations
Chemical exfoliation using alpha hydroxy acids (AHA) and beta hydroxy acids (BHA) creates the smooth skin texture necessary for flawless no-makeup makeup application. AHA formulations, particularly glycolic and lactic acids, work on the skin’s surface to remove dead cells and reveal the fresh, luminous skin underneath. These water-soluble acids prove especially beneficial for addressing surface irregularities and promoting cellular turnover.
BHA formulations, primarily salicylic acid, penetrate deeper into pores to address congestion and blackheads that can disrupt the smooth appearance essential for natural-looking coverage. The oil-soluble nature of BHA makes it particularly effective for those with combination or oily skin types who struggle to achieve seamless makeup application without addressing underlying skin texture issues.
Hydrating primer selection for different skin types
Primer selection represents a critical decision point that can make or break the entire no-makeup makeup look. For dry skin types, silicone-based primers with hyaluronic acid provide the necessary hydration boost while creating a smooth base that prevents makeup from clinging to dry patches. These formulations fill in fine lines and create an even surface for subsequent product application.
Oily and combination skin types benefit from mattifying primers that contain niacinamide or zinc oxide to control excess sebum production throughout the day. However, avoid overly mattifying formulations that can create an unnaturally flat appearance. Instead, opt for primers that provide shine control while maintaining a subtle luminosity that mimics healthy skin’s natural radiance.
Colour correcting techniques using peach and green undertones
Strategic colour correction forms the invisible foundation of flawless no-makeup makeup, addressing specific discolouration issues without creating obvious makeup lines. Peach and salmon-toned correctors effectively neutralise dark circles and purple-toned discolouration, particularly around the under-eye area where traditional concealer alone might appear too heavy or obvious.
Green-toned correctors target redness around the nose, chin
and any post-inflammatory redness from previous breakouts. Apply a thin layer only where needed, using a small synthetic brush or your fingertip, then gently tap to diffuse the edges until the green is barely visible. The aim is not to erase the redness with a thick, mint-toned mask, but to create a soft neutral base that allows you to use less concealer and maintain a believable, skin-like finish. When colour correcting is done correctly, you will notice that your overall complexion looks more even before you have technically “covered” anything.
Strategic concealer application for effortless coverage
With the skin properly prepped and discolouration subtly neutralised, concealer becomes the star of the no-makeup makeup look. Instead of using a traditional foundation layer, we rely on precise concealer placement to create a naturally even complexion that still allows freckles, beauty marks, and real skin texture to show through. This strategic approach not only reduces product load on the skin but also enhances longevity, as there is less pigment to crease, cake, or collect in expression lines over the day.
Under-eye brightening with salmon-toned correctors
Under-eye darkness is often the biggest giveaway that you are wearing makeup, particularly when heavy, opaque formulas are used. Salmon-toned correctors bridge the gap between skincare and makeup by working with colour theory to neutralise blue, purple, and green undertones commonly found in the tear trough area. Think of them as tinted “erasers” that subtly cancel discolouration so that your actual concealer can be used more sparingly and look more like real skin.
For best results, apply a tiny amount of salmon corrector only where the shadow is deepest, typically the inner corner and hollow of the eye socket. Use your ring finger to tap and warm the product into the skin, rather than dragging it across the delicate under-eye area. Once the discolouration is muted, you can layer a lightweight, hydrating concealer on top, focusing on brightening rather than masking. This layered yet minimal approach prevents that heavy, creased look that can age the eye area and betray the no-makeup makeup illusion.
Spot concealing using stippling and pressing techniques
Instead of blanketing the face with coverage, spot concealing targets only the areas that genuinely require correction, such as blemishes, post-acne marks, or small patches of hyperpigmentation. The key here is precision: a small, pointed concealer brush or even a fine eyeliner brush allows you to place pigment exactly where it is needed. By working in pinpoint areas, you use far less product overall while still achieving a remarkably even skin tone.
The stippling and pressing techniques are essential for keeping the coverage undetectable. After placing a dot of concealer over the area of concern, use the tip of your brush or fingertip to gently tap around the edges, blurring the pigment into surrounding bare skin. Avoid sweeping motions, which can create obvious edges or remove coverage from the centre of the spot. When done correctly, the mark disappears into the rest of your complexion, and even at close range it becomes difficult to see where the concealer begins and ends.
Redness neutralisation around nose and chin areas
For many people, the nose and chin are high-traffic zones for redness due to broken capillaries, sensitivity, or hormonal fluctuations. In a no-makeup makeup look, this redness can quickly draw attention and counteract your otherwise even base. Rather than layering thick coverage, the goal is to neutralise just enough that the natural tones of your skin read as balanced and healthy.
Start by lightly pressing a green-tinted corrector or a neutralising concealer around the sides of the nostrils, the tip of the nose, and any redness on the chin. Use a small brush to work the product into these specific areas, then tap with a fingertip or sponge to soften the transition into surrounding bare skin. Remember that some warmth and natural variation are normal and desirable; you do not need to eliminate every trace of pink. Leaving a hint of colour will keep the effect believable and aligned with the “your skin but better” philosophy.
Blending methods with damp beauty sponges and synthetic brushes
The tools you choose for blending can make the difference between a flawless no-makeup makeup base and a patchy, overworked finish. A damp beauty sponge offers a soft-focus, diffused effect that is ideal for melting concealer into the skin without visible edges. Think of it as a mini airbrush: by bouncing the sponge lightly over concealed areas, you remove any excess product and ensure that coverage looks seamless rather than sitting on top of the skin.
Synthetic brushes, particularly densely packed buffing or stippling brushes, are excellent for targeted blending where you want a bit more coverage retention. Use small, tapping motions with the tips of the bristles, avoiding aggressive circular buffing that can disturb your colour correction or skin prep underneath. Many professionals alternate between brushes and sponges, using brushes to place and concentrate pigment, then a sponge to soften and diffuse. This layered tool strategy gives you maximum control while preserving the skin’s natural texture—core to mastering the no-makeup makeup trend flawlessly.
Foundation-free complexion building strategies
Once you understand how to use concealer strategically, you can start to build a beautiful, even complexion without relying on traditional foundation at all. This foundation-free approach is particularly effective for days when you want your skin to breathe, yet still appear rested and refined. It also supports long-term skin health by reducing the risk of clogged pores and irritation that can come from heavy, daily base makeup.
Begin by assessing your face in natural daylight and identifying where you actually need coverage; most of us overestimate this. Concentrate light layers of concealer or skin tint in the centre of the face—the areas around the nose, mouth, and under the eyes—then allow the outer perimeter to remain largely bare. This subtle gradient mimics the way healthy skin naturally has a little more colour in the cheeks and perimeter, and it prevents that mask-like effect that even sheer foundations can sometimes create.
To add back life and dimension, incorporate sheer, skincare-infused complexion products such as tinted moisturisers, liquid highlighters, or gel bronzers only where needed. Think of these as translucent veils rather than coverage; their job is to enhance rather than hide. By layering a glow-boosting serum under your concealer or mixing a drop of liquid highlighter into your moisturiser, you can achieve a luminous, “from within” radiance that looks more like great skincare than obvious makeup. This is the essence of a foundation-free routine that still reads as polished and professional.
Eye enhancement without traditional eye makeup
One of the most striking aspects of a convincing no-makeup makeup look is how awake and defined the eyes appear—without obvious eyeliner wings, heavy mascara, or bold shadows. Instead of building intricate eye looks, we focus on subtle structural enhancements that make the eyes look brighter, more lifted, and naturally expressive. The goal is that someone will notice your eyes, not your eye makeup.
Lash lifting techniques and transparent mascara application
Curled, separated lashes are essential for opening up the eye area while still appearing understated. A lash curler used correctly can mimic the effect of a professional lash lift, especially when combined with a clear or brown-toned mascara. To create a soft, eye-opening curl, position the curler at the base of the lashes, squeeze gently, then “walk” it up the length of the lashes in two or three increments. This creates a natural bend rather than a harsh, crimped angle that can give away your use of tools.
Transparent mascara is a powerful ally in the no-makeup makeup routine, particularly if you want definition without the obvious pigment of black formulas. It coats the lashes, adds a subtle sheen, and holds the curl in place throughout the day, making the eyes look more alert and youthful. If you prefer a bit more visibility, reach for a soft brown mascara and concentrate application at the roots only, using a clean spoolie to comb through and remove any clumps. This root-focused technique thickens the lash line without creating the tell-tale “mascara tips” that can make the look appear more done.
Brow lamination effects using soap brow methods
Full, softly structured brows frame the face and can instantly make your no-makeup makeup look appear more intentional and polished. Brow lamination, a professional treatment that sets hairs in an upward, fluffy direction, has inspired at-home “soap brow” techniques that offer a similar effect without the commitment. By using a clear, glycerin-based soap or a dedicated brow styling product, you can coax even sparse or unruly brows into a lifted, feathered shape that still looks like real hair.
To achieve this laminated effect, dampen a spoolie slightly and rub it on the surface of your soap or brow wax to pick up a small amount of product. Then brush the hairs upward and outward, following the natural growth pattern, and gently press them into place with your fingertip. If you need extra definition, you can go back in with a micro-fine brow pencil to draw individual hair strokes only where there are visible gaps. Because the bulk of the definition comes from styling the actual hairs rather than painting on pigment, the final result remains soft, airy, and perfectly suited to a no-makeup makeup aesthetic.
Subtle definition with cream eyeshadows in neutral tones
When you want to enhance your eye shape without it looking like you are wearing “eyeshadow,” cream formulas in neutral tones are your best option. These products melt into the skin and can be sheered out to a barely-there wash that simply adds depth and dimension. Shades like soft taupe, beige, and muted rose mimic the natural shadows of the eye socket, which is why they are ideal for this minimalist style.
Apply a small amount of cream shadow to the mobile lid using your fingertip, then blend it upward and outward into the crease with a clean finger or a fluffy synthetic brush. Focus on creating a gradient where the colour is most concentrated near the lash line and diffuses as it moves toward the brow bone. If you choose a shade just one or two tones deeper than your natural skin, the effect will be similar to that of a subtle contour, sculpting the eye without calling attention to specific colours or finishes. This is especially effective on days when you want your features to look quietly enhanced for work, video calls, or casual social settings.
Inner corner highlighting with pearl and champagne shades
A small touch of light at the inner corners of the eyes can make you look instantly more awake, even if you have had minimal sleep. Pearl and champagne-toned highlighters are ideal for this because they brighten without the starkness that white or silver can create. The goal is to mimic the natural moist sheen of the inner eye area, not to add visible shimmer or metallic sparkle that shifts the look into full glam territory.
Use a tiny brush or your pinky finger to place a pinpoint of product right at the tear duct, then softly blend it downward and slightly along the upper and lower lash lines. If you are prone to watery eyes or fine lines, select a cream or balm-based highlighter that will meld seamlessly with the skin and resist flaking. This subtle halo of light reflects brightness back into the eyes and complements your lifted lashes and softly defined brows, completing an eye enhancement routine that supports the no-makeup makeup trend flawlessly.
Natural flush creation through cream blush techniques
A believable flush is one of the most effective ways to make a minimal makeup look appear youthful and healthy. Cream blush formulas are particularly suited to this because they mimic the translucency and softness of real blood flow beneath the skin. Powder formulations can work, but they are more likely to sit on the surface and emphasise dryness or fine texture, which can contradict the skin-first, natural-focus ethos of the no-makeup makeup trend.
To determine where to place your blush, smile gently and note where your cheeks naturally lift and warm. Apply a small amount of cream blush to these areas, then blend upward toward the temples and slightly across the bridge of the nose for that “just came in from a brisk walk” effect. Using your fingertips allows the warmth of your skin to soften the product, almost like blending a stain into paper, while a dense, synthetic brush can create a more diffused veil of colour. You can also use the “W-shape” technique—lightly sweeping the blush in a continuous motion across one cheek, over the nose, and onto the other cheek—to achieve a cohesive, sun-kissed appearance.
For extra cohesion, choose blush shades that echo your natural flush: soft rose, peach, and terracotta tones are usually the most flattering and forgiving. Cream blushes that double as lip colour are particularly efficient in a minimal routine, as they allow you to tie the entire look together with just one product. By repeating the same hue on cheeks and lips, you create visual harmony that suggests inherent, natural colouring rather than clearly placed cosmetics.
Lip enhancement using lip stains and balm layering methods
Lips often reveal how much makeup you are truly wearing; a sharply lined, fully opaque lip contrasts sharply with a bare-skin base. For a no-makeup makeup look, the aim is to enhance your natural lip tone and shape while maintaining softness, flexibility, and a touch of healthy shine. Lip stains and balms are ideal here, offering customisable colour and hydration without the heaviness or precision demands of traditional lipstick.
Begin by treating the lips as part of your skincare routine: gently exfoliate with a damp washcloth or a mild lip scrub, then apply a nourishing balm and let it absorb while you work on the rest of your face. Once your lips are smooth and hydrated, blot away any excess balm and press a sheer lip stain into the centre of the lips with your fingertip. By working from the inside out, you create a soft gradient—similar to a naturally flushed lip—rather than a hard line around the edges.
To finish, layer a translucent or lightly tinted balm over the stain, focusing on the middle of the lips to create a subtle, light-catching effect. This layering method not only prolongs wear time but also allows you to adjust the intensity throughout the day; you can simply reapply balm for comfort without needing a mirror. If you prefer a slightly more defined look, you can lightly trace just the outer corners with a lip liner that matches your natural lip colour, then blend the line inward with your finger so that no harsh edge remains. The end result is a plump, hydrated, and softly tinted lip that perfectly complements your fresh, natural complexion—completing the no-makeup makeup trend in a way that feels effortlessly polished rather than overtly made up.