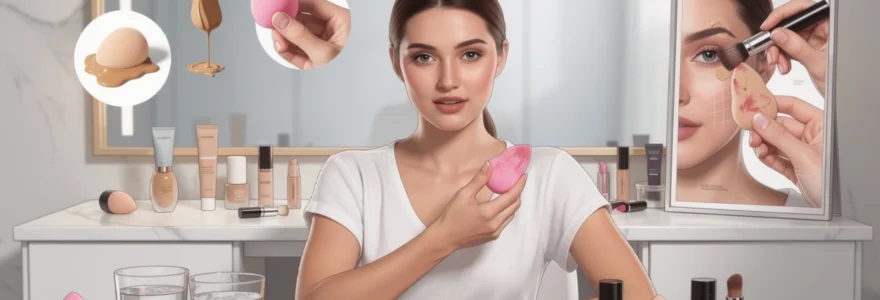
Beauty blending sponges have revolutionised the makeup industry, transforming how millions of people achieve flawless, airbrushed finishes. However, despite their popularity, many users unknowingly make critical errors that compromise both the tool’s performance and their makeup application results. These seemingly innocent mistakes can lead to streaky foundation, premature deterioration of the sponge, bacterial contamination, and ultimately, a frustrating beauty routine that falls short of professional standards.
Understanding proper beauty blender techniques isn’t merely about following instructions – it’s about maximising your investment whilst protecting your skin from potential irritation and breakouts. Whether you’re a makeup novice or an experienced enthusiast, avoiding these common pitfalls will elevate your application technique and extend the lifespan of your beauty tools significantly.
Pre-application preparation errors that compromise beauty blender performance
The foundation of exceptional makeup application begins long before product touches skin. Pre-application preparation represents the most critical phase in beauty blender usage, yet it’s where the majority of users make their most detrimental mistakes. These oversights create a cascade of problems that affect everything from product distribution to final finish quality.
Inadequate hydration protocols for Latex-Free and natural rubber variants
The most pervasive error in beauty blender usage involves insufficient hydration of the sponge material. Many users assume a quick rinse under running water provides adequate preparation, but this approach fundamentally misunderstands the aqua-activated foam technology that makes these tools so effective. Different sponge compositions require varying hydration approaches – latex-free variants typically need 30-45 seconds of thorough saturation, whilst natural rubber alternatives may require slightly longer exposure.
Proper hydration transforms the sponge’s cellular structure, increasing its size by approximately 50% and creating the optimal porosity for product application. When inadequately hydrated, the sponge absorbs foundation rather than distributing it, leading to product waste and uneven coverage. The material should feel plump and fully expanded, with water permeating every cell throughout the sponge’s core.
Temperature control misconceptions during saturation process
Temperature plays a crucial role in achieving optimal sponge performance, yet many users overlook this critical factor. Extremely hot water can damage the foam’s delicate cellular structure, causing premature breakdown and reducing the sponge’s lifespan. Conversely, very cold water prevents proper expansion and may leave the material too firm for effective blending.
The ideal temperature range falls between 20-25°C (68-77°F), providing sufficient warmth to encourage full expansion without compromising material integrity. This temperature range also prevents thermal shock to the foam cells, maintaining the sponge’s bounce and flexibility throughout its intended lifespan. Professional makeup artists consistently emphasise that lukewarm water creates the perfect balance between activation and preservation.
Contaminated water sources and their impact on blender integrity
Using contaminated water sources during the preparation phase introduces bacteria and impurities directly into the sponge’s porous structure. Hard water containing high mineral content can gradually accumulate within the foam cells, creating rough textures and potentially causing skin irritation. Additionally, chlorinated water may react with certain sponge materials over time, leading to degradation and colour changes.
Filtered or distilled water provides the cleanest preparation environment, preventing mineral buildup and reducing the risk of bacterial contamination. This consideration becomes particularly important for individuals with sensitive skin or those prone to breakouts, as contaminated preparation water can introduce irritants that compromise skin health during application.
Insufficient expansion assessment before product application
Many users proceed with makeup application without properly assessing whether their beauty blender has achieved full expansion. An incompletely expanded sponge exhibits irregular surface texture, maintains areas of firmness, and fails to provide the consistent bounce necessary for seamless blending. This oversight directly impacts the final makeup appearance and can create patchy or streaked results.
Proper expansion assessment involves gently squeezing the sponge to evaluate its uniformity and bounce-back response. The material should feel consistently soft throughout, with no firm or dense areas remaining. Visual inspection should reveal
uniform expansion with no visible shrivelling or compressed zones. If the sponge appears uneven in size, with certain areas remaining smaller or denser, continue hydrating and squeezing until the entire beauty blender reaches a consistent, pillowy texture. Skipping this simple expansion check is a key reason many users experience patchy foundation, visible streaks and difficulty achieving that coveted airbrushed finish.
Product loading techniques that damage beauty blender structure
Once your beauty blender is properly prepped, the next critical phase is how you load it with product. The way you introduce foundation, concealer, and other formulas to the sponge has a direct impact on both coverage quality and long-term durability. Aggressive saturation, incompatible formulas and poor pressure control can all weaken the foam cells, shorten the sponge’s lifespan and give you a less refined makeup result.
Excessive foundation saturation leading to premature deterioration
Overloading a beauty blender with foundation is one of the fastest ways to compromise its structural integrity. When you repeatedly soak the sponge with heavy layers of product, the hydrophilic foam cells are forced to expand beyond their optimal threshold, trapping pigments and oils deep within the core. Over time, this creates internal stiffness, uneven texture and visible staining that no amount of cleansing can fully reverse.
From a performance standpoint, excessive saturation also sabotages your base. Rather than dispersing a thin, even veil of foundation across the skin, an overloaded sponge tends to smear, creating thick patches and a cakey finish. A more efficient technique is to start with a minimal amount of product—either dotted on the face or placed on the back of your hand—and gradually build coverage with light, repeated dabbing. This approach protects the foam structure while giving you greater control over opacity and finish.
Incompatible formulation types with hydrophilic foam technology
Not every makeup formula plays well with hydrophilic sponge technology. Ultra-dry, fast-setting matte foundations, high-silicone primers and certain oil-heavy cream sticks can cling to the foam cells rather than glide across them, leading to patchy application and accelerated wear on the sponge material. You may notice the surface of your beauty blender developing a waxy film or feeling less bouncy when used consistently with these formulations.
To avoid this, consider how your foundation or complexion product behaves when exposed to water. Liquids and creams designed for dewy or natural finishes typically pair best with damp beauty blenders, allowing the aqua-activated foam to distribute them evenly. For very silicone-rich or oil-dense products, you might achieve better results by applying them first with fingers or a flat brush, then using the damp sponge purely as a blending tool. This hybrid method minimises direct friction between challenging formulas and the foam, preserving both the tool and your makeup finish.
Direct product dispensing onto blender surface complications
Squeezing foundation or concealer directly onto the surface of your beauty blender may seem convenient, but it can cause several long-term problems. First, it encourages localised oversaturation, where one area of the sponge becomes overloaded while the rest remains underutilised. This uneven product distribution leads to inconsistent coverage on the skin and forces you to work harder to blend everything out.
Secondly, direct dispensing drives product deep into the inner foam layers, where it is more difficult to remove during cleansing. Over time, this trapped residue stiffens specific regions of the sponge, causing micro-tears as the surrounding cells attempt to compress and expand around these rigid zones. A more professional loading method is to apply product to a sanitary palette—or the back of your clean hand—then tap the damp beauty blender onto the product, gradually picking up only as much as you need. This keeps the sponge surface flexible, responsive and significantly easier to clean.
Incorrect pressure application during initial product distribution
The pressure you use during the first few passes of foundation application sets the tone for the entire blending process. Many users instinctively press too hard, compressing the foam to the point where it acts more like a stamp than a diffuser. Excessive force squeezes product out of the sponge and onto the skin in concentrated patches, making it harder to achieve a smooth, seamless base.
Optimal pressure is light to medium, allowing the beauty blender to maintain its natural bounce. Imagine tapping a water balloon against a surface—you need enough contact to transfer some of the contents, but not so much that it bursts or flattens. Begin with soft, rhythmic dabs, letting the sponge “kiss” the skin while gradually building coverage. This technique respects the foam’s engineered elasticity, reducing mechanical stress on the cells and preserving that signature airbrushed effect.
Application method failures affecting coverage and blender longevity
Even when your beauty blender is perfectly hydrated and correctly loaded, poor application technique can still undermine your results. The motions you use, the angles you choose and how you adapt pressure to different areas of the face all influence both coverage quality and the physical strain placed on the sponge. Missteps at this stage not only create streaky or uneven finishes but also accelerate wear and tear on the foam material.
One of the most common application errors is dragging or wiping the sponge across the skin, as if it were a traditional brush. This lateral friction shears against the foam cells, gradually weakening them and causing micro-abrasions that eventually develop into visible tears. From a coverage standpoint, swiping simply pushes product around the surface rather than pressing it into the skin, which is why it often leaves faint lines and bare patches behind. In contrast, the recommended stippling—or bouncing—motion compresses and releases the sponge vertically, allowing it to deposit and diffuse pigment while maintaining structural integrity.
Angle control is another overlooked factor. Using only the broad base of the blender for every area of the face forces you to over-bend the foam when working around the nose, eyes and lips. Over time, this repetitive over-flexing can produce weak points along the midline of the sponge. Instead, rotate between the base, sides and pointed tip depending on the area you’re working on. The pointed end is ideal for targeted concealer placement under the eyes and around the nostrils, while the rounded sides help soften contour lines and blend blush without over-stressing a single section.
Finally, many users forget to adjust their technique based on coverage goals. When you want sheer, skin-like results, using a damp beauty blender with lighter pressure and broader strokes will diffuse product more widely. For higher coverage, concentrate your bouncing motions in smaller zones, layering product gradually rather than attempting full opacity in one pass. This strategic approach not only elevates your makeup finish but also ensures you are not overworking the sponge, thereby extending its usable lifespan.
Cross-contamination prevention oversights in multi-product applications
Modern makeup routines often involve layering multiple product types—liquid foundation, cream contour, concealer, blush, highlighter and setting powder—all within a single session. While your beauty blender is designed to be versatile, using it interchangeably across all these products without a strategy can lead to cross-contamination, muddied colours and faster bacterial buildup. Think of it like using one paintbrush for every shade on a canvas; sooner or later, everything turns the same dull tone.
A frequent mistake is applying foundation, then immediately dipping the same uncleaned side of the sponge into cream blush or contour. Residual base product mixes with the new formula, diluting pigment and making precise placement harder to control. To avoid this, designate different zones of your beauty blender for specific steps—one side for foundation, another for concealer and the tip or edge for high-pigment products like cream bronzer. Rotating the sponge as you work helps maintain cleaner colour transitions and keeps textures from becoming overly mixed.
Hygiene is another major concern. When a single sponge is used with liquid foundation, under-eye concealer and spot-correcting products, it repeatedly contacts areas that may be more prone to bacteria, such as active breakouts. Without regular rinsing between steps, you’re effectively transferring those impurities across your entire complexion. A simple yet effective protocol is to give the blender a quick rinse under lukewarm water and gently squeeze it out before moving from base products to targeted concealing or from cream products to powder. This small habit can significantly reduce the risk of congestion and irritation.
For those who regularly work with both skincare and makeup, an additional level of separation is recommended. Using the same beauty blender for serums, moisturisers and then foundation in a single sitting might seem efficient, but residual emollients can interfere with makeup adherence and longevity. Consider assigning one sponge exclusively for skincare application and another for colour cosmetics, or at minimum, ensure thorough cleansing between these two categories. By treating your beauty blender as a precision tool rather than an all-purpose applicator, you maintain cleaner formulas, clearer skin and a more polished final result.
Post-use maintenance protocol violations that reduce beauty blender lifespan
The way you care for your beauty blender after each use is just as important as how you apply makeup with it. Poor maintenance habits quickly translate into reduced bounce, visible tears, stubborn stains and, more worryingly, bacterial overgrowth. Given that this tool comes into direct contact with your skin on a regular basis, establishing a consistent, gentle cleaning and drying routine is non-negotiable if you want to protect both your investment and your complexion.
Harsh surfactant-based cleansers degrading foam cell structure
While it may be tempting to reach for strong dish soaps or multipurpose detergents to remove stubborn foundation stains, these harsh surfactant-based cleansers can severely damage your beauty blender over time. Formulas high in sulphates or degreasing agents strip not only makeup residue but also the protective treatments and plasticisers that keep the foam soft and elastic. The result is a sponge that feels rough, loses its signature bounce and becomes more susceptible to cracking.
A better approach is to use gentle, pH-balanced cleansers specifically designed for makeup tools, or mild fragrance-free soaps. These options break down pigments and oils without aggressively attacking the foam’s cellular structure. To clean effectively, lather the cleanser in your hands, then massage it into the damp sponge using light, squeezing motions rather than twisting or wringing. This method maintains the integrity of the foam cells while still achieving a thorough cleanse, even when you wear long-wear or high-coverage products daily.
Inadequate drying environments promoting bacterial growth
Even the most meticulous cleansing routine can be undermined if your beauty blender is left to dry in the wrong environment. Storing a damp sponge in an enclosed makeup bag, drawer or unventilated container creates the perfect breeding ground for bacteria and mould. Because the foam is highly porous, it retains moisture deep within its core, and without proper air circulation, that moisture can remain trapped for hours—or even days.
To encourage hygienic drying, always place your freshly washed beauty blender in a well-ventilated, light-exposed area. You can rest it on a clean, dry towel, a breathable mesh stand or a dedicated sponge holder that elevates it off flat surfaces. Avoid placing it directly on radiators or heaters, as excessive heat can warp the foam and cause it to become brittle. Instead, think of drying your sponge the way you would a delicate fabric: plenty of airflow, moderate temperature and as little direct contact with other objects as possible.
Storage conditions that accelerate material breakdown
How and where you store your beauty blender between uses has a direct impact on its longevity. Many people toss their sponge into the bottom of a makeup bag, where it rubs against sharp-edged tools like tweezers, lash curlers and pencil sharpeners. This constant friction and occasional puncturing can create tiny nicks that eventually expand into full tears. Additionally, closed cosmetic bags often trap residual humidity, even if the sponge felt dry to the touch when you put it away.
For optimal storage, consider a dedicated, ventilated container such as a perforated case or mesh pouch that protects the foam from physical damage while still allowing air to circulate. Keep the sponge away from direct sunlight over extended periods, as prolonged UV exposure can gradually weaken certain foam materials and fade their colour. By treating your beauty blender as a professional tool rather than a disposable accessory, you significantly extend its usable life and maintain consistent performance day after day.
Frequency miscalculations for deep cleaning cycles
Another common maintenance mistake is underestimating how often a beauty blender requires a deep clean. While a quick rinse after each use helps remove surface residue, it rarely reaches the pigments and oils lodged in the inner foam cells. Over time, this buildup can alter the sponge’s texture, reduce its flexibility and provide a nutrient-rich environment for microbes. Dermatologists frequently highlight dirty makeup tools as a contributing factor to breakouts and irritation, particularly in those with acne-prone or sensitive skin.
As a general guideline, aim for a thorough deep clean at least once a week if you use your beauty blender daily, and more frequently during hot, humid weather when bacteria proliferate more rapidly. A deep clean involves soaking the sponge briefly in lukewarm water mixed with a gentle cleanser, then working the solution through the core with repeated compression and release motions until the rinse water runs clear. Regularly scheduling these intensive cleansing sessions ensures your sponge remains soft, responsive and hygienic, while also giving you an opportunity to inspect it for early signs of wear or damage.
Replacement timing misjudgements and quality deterioration indicators
No matter how carefully you prep, use and maintain your beauty blender, it is not designed to last indefinitely. One of the most underestimated aspects of sponge hygiene is recognising when it is time to retire your current tool and introduce a new one into your routine. Holding on to an ageing, compromised blender can quietly undo much of your hard work, leading to streaky application, increased bacteria exposure and unnecessary frustration.
So how do you know when a beauty blender has reached the end of its effective life? Visible tears, deep cracks and fraying edges are the most obvious indicators that the foam structure has been compromised. You might also notice that the sponge no longer returns to its original shape after being squeezed, or that certain areas feel denser and less bouncy than before. Persistent staining—despite thorough cleaning—can signal that product has permanently embedded itself within the core, altering the foam’s behaviour and making it harder to achieve an even finish.
Time is another useful benchmark. Many professionals recommend replacing heavily used beauty blenders every one to three months, depending on frequency of use, product types and maintenance habits. If you wear full-coverage foundation daily and rely on your sponge as your primary tool, err on the side of more frequent replacement. Conversely, if you use it only a few times a week and clean it consistently, you may be able to safely extend its life closer to the upper end of that range. Pay close attention to changes in how your makeup looks; if your base suddenly appears patchier or more textured without any change in products, your sponge may be the culprit.
Ultimately, viewing replacement as a regular, proactive step rather than a last resort will help maintain both your makeup standards and your skin health. Just as you would not expect a single mascara wand or toothbrush to perform flawlessly forever, your beauty blender also has a natural lifespan. By learning to recognise early warning signs of deterioration and planning timely replacements, you ensure that every application benefits from the full potential of this sophisticated tool, keeping your complexion smooth, even and impeccably blended.